How to Enable Free SSL (HTTPS) on Your Wazuh Dashboard with Let's Encrypt and Nginx
2026-05-06 · Neetrox
If you’ve deployed Wazuh in production, your dashboard is probably still running on a self-signed certificate. Every time your team opens the web UI, they’re greeted by that annoying browser warning — “Your connection is not private.” It’s not just ugly; it’s a security concern for a security platform.
In this guide, I’ll show you how to set up a free, auto-renewing Let’s Encrypt SSL certificate on your Wazuh Dashboard using Nginx as a reverse proxy. This gives you a proper green padlock, eliminates browser warnings, and adds a layer of production-grade TLS in front of your SIEM.
Why Use Nginx as a Reverse Proxy?
You might think — “Wazuh Dashboard already has SSL built in, why add Nginx?” Good question. Here’s why the reverse proxy approach is better:
- Trusted certificate — Let’s Encrypt certs are trusted by all browsers, unlike Wazuh’s self-signed certs
- Automatic renewal — Certbot handles renewals in the background, zero maintenance
- Clean URLs — Access your dashboard on
https://yourdomain.cominstead ofhttps://192.168.10.14:443 - Separation of concerns — Nginx handles TLS termination, Wazuh handles security analytics
Prerequisites
Before starting, make sure you have:
- A running Wazuh Dashboard (from a multi-node or single-node deployment)
- A domain name pointing to your Dashboard server’s public IP (I’m using
2one2.onein this guide) - Root or sudo access to the Dashboard server
- Port 80 and 443 open on your firewall
Step 1: Install Certbot
SSH into your Wazuh Dashboard server and install Certbot along with the Nginx plugin:
sudo apt update
sudo apt install certbot python3-certbot-nginx -y
Step 2: Get the SSL Certificate
Here’s where people typically run into trouble. Certbot’s standalone mode needs port 80 to be free, but if Nginx or Wazuh Dashboard is already running, the port will be occupied and you’ll get this error:
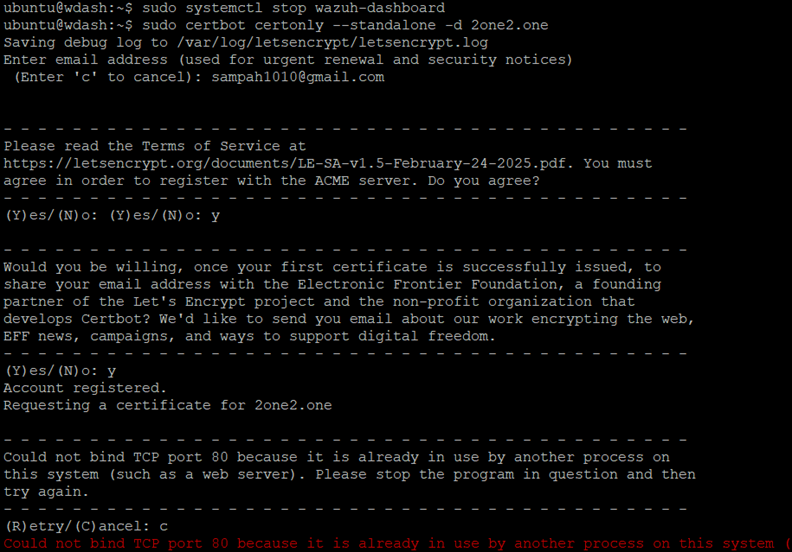
The fix is simple — stop both services before requesting the certificate:
sudo systemctl stop wazuh-dashboard
sudo systemctl stop nginx
sudo certbot certonly --standalone -d yourdomain.com
Replace yourdomain.com with your actual domain. Certbot will ask for your email and agreement to the Terms of Service, then issue the certificate.
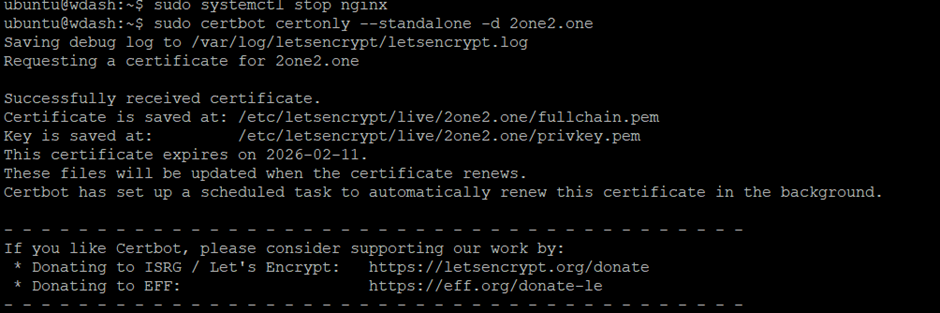
Take note of the certificate paths — you’ll need them for the Nginx config:
- Certificate:
/etc/letsencrypt/live/yourdomain.com/fullchain.pem - Private key:
/etc/letsencrypt/live/yourdomain.com/privkey.pem
Step 3: Create the Nginx Reverse Proxy Configuration
Now we’ll configure Nginx to sit in front of the Wazuh Dashboard. Create a new site config:
sudo nano /etc/nginx/sites-available/wazuhPaste the following configuration (replace yourdomain.com with your domain):
server {
    listen 80;
    listen [::]:80;
    server_name yourdomain.com;
    # Redirect all HTTP to HTTPS
    return 301 https://$server_name$request_uri;
}
server {
    listen 443 ssl http2;
    listen [::]:443 ssl http2;
    server_name yourdomain.com;
    # SSL Configuration
    ssl_certificate /etc/letsencrypt/live/yourdomain.com/fullchain.pem;
    ssl_certificate_key /etc/letsencrypt/live/yourdomain.com/privkey.pem;
    # SSL Security Settings
    ssl_protocols TLSv1.2 TLSv1.3;
    ssl_prefer_server_ciphers on;
    ssl_ciphers ECDHE-RSA-AES256-GCM-SHA512:DHE-RSA-AES256-GCM-SHA512:ECDHE-RSA-AES256-GCM-SHA384:DHE-RSA-AES256-GCM-SHA384;
    ssl_session_timeout 10m;
    ssl_session_cache shared:SSL:10m;
    # Proxy settings for Wazuh Dashboard
    location / {
        proxy_pass http://localhost:5601;
        proxy_http_version 1.1;
        proxy_set_header Upgrade $http_upgrade;
        proxy_set_header Connection 'upgrade';
        proxy_set_header Host $host;
        proxy_cache_bypass $http_upgrade;
        proxy_set_header X-Real-IP $remote_addr;
        proxy_set_header X-Forwarded-For $proxy_add_x_forwarded_for;
        proxy_set_header X-Forwarded-Proto $scheme;
        # WebSocket support
        proxy_read_timeout 86400;
        # Disable SSL verification for backend (since Wazuh uses self-signed)
        proxy_ssl_verify off;
    }
}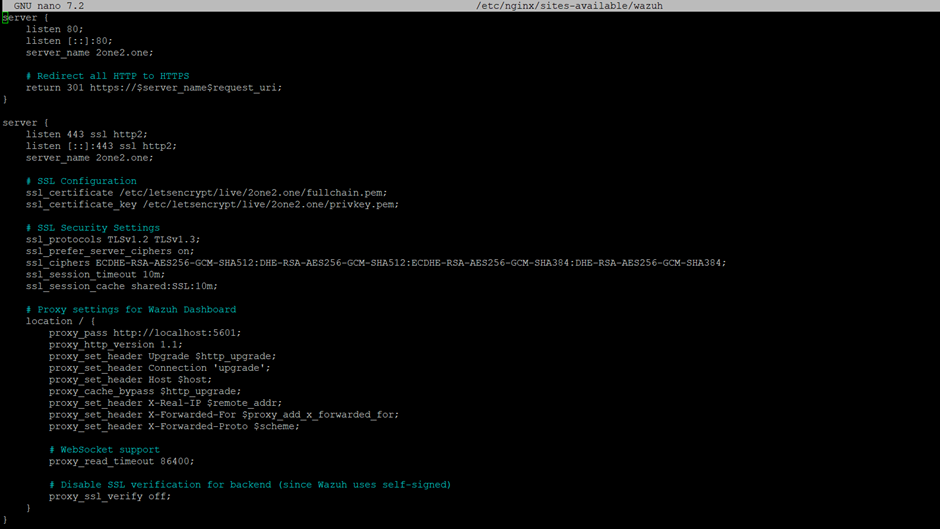
Let me break down what this config does:
- First server block — Catches all HTTP traffic on port 80 and redirects it to HTTPS
- Second server block — Listens on 443 with your Let’s Encrypt cert, then proxies requests to the Wazuh Dashboard running locally on port 5601
- SSL settings — Enforces TLS 1.2/1.3 with strong cipher suites
- WebSocket support — The
Upgradeheaders ensure the Dashboard's real-time features work properly proxy_ssl_verify off— Required because Wazuh's internal cert is self-signed
Step 4: Enable the Site and Test
Enable the Nginx site, remove the default config, and test:
# Enable the site
sudo ln -s /etc/nginx/sites-available/wazuh /etc/nginx/sites-enabled/
# Remove default site if it exists
sudo rm /etc/nginx/sites-enabled/default
# Test Nginx configuration
sudo nginx -t
You should see:
nginx: the configuration file /etc/nginx/nginx.conf syntax is ok
nginx: configuration file /etc/nginx/nginx.conf test is successful
Step 5: Configure the Wazuh Dashboard for Reverse Proxy
Since Nginx now handles SSL, we need to tell the Wazuh Dashboard to stop handling it directly and listen on a local port instead.
Edit the dashboard config:
sudo nano /etc/wazuh-dashboard/opensearch_dashboards.ymlMake these two changes:
- Change
server.portto5601(this is the port Nginx will proxy to) - Set
server.ssl.enabledtofalse(Nginx handles SSL now)
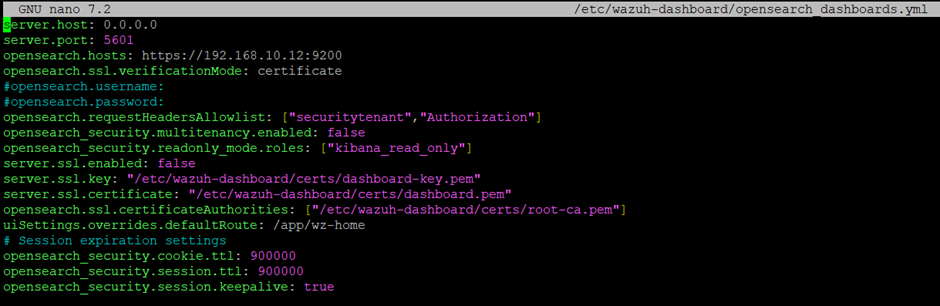
Security note: The Dashboard now listens on port 5601 without SSL, but it’s only accessible from localhost since Nginx proxies the traffic. Make sure your firewall blocks external access to port 5601 — only port 443 should be exposed publicly.
Step 6: Restart Services
Bring everything back up in the right order:
# Restart Wazuh Dashboard
sudo systemctl restart wazuh-dashboard
# Start Nginx
sudo systemctl start nginx
# Verify both are running
sudo systemctl status nginx
sudo systemctl status wazuh-dashboard
Step 7: Test Your Secure Dashboard
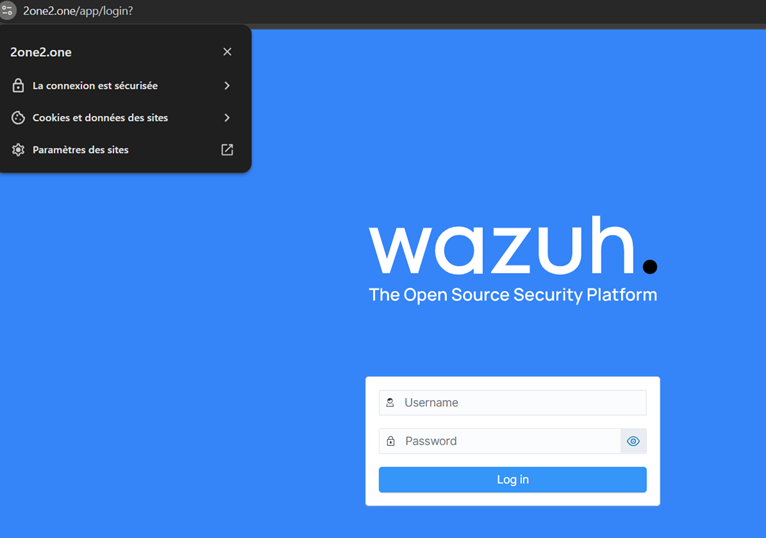
Open your browser and navigate to your domain:
https://yourdomain.comYou should see the Wazuh login page with a valid SSL certificate — green padlock, no warnings, fully trusted.
That’s it. Your Wazuh Dashboard is now secured with a trusted, auto-renewing Let’s Encrypt certificate.
Bonus: Auto-Renewal
Certbot automatically sets up a cron job or systemd timer for renewal. You can verify it with:
sudo certbot renew --dry-runIf you want to make sure Nginx reloads after renewal, add a deploy hook:
sudo certbot renew --deploy-hook "systemctl reload nginx"Certificates renew automatically every 90 days — zero maintenance on your end.
Troubleshooting
“Could not bind TCP port 80” — Stop Nginx and Wazuh Dashboard before running certbot in standalone mode.
502 Bad Gateway — The Wazuh Dashboard isn’t running on port 5601. Check systemctl status wazuh-dashboard and ensure the port matches your Nginx config.
Certificate not trusted — Make sure your domain’s DNS A record points to the server’s public IP, and that you used the domain name (not IP) when running certbot.
WebSocket errors in the Dashboard — Ensure the Upgrade and Connection proxy headers are set in your Nginx config.
Wrapping Up
You’ve gone from a self-signed certificate with browser warnings to a production-grade Let’s Encrypt setup with Nginx reverse proxy. Your SOC team can now access the Wazuh Dashboard securely from any browser without trusting a custom CA.
This pairs perfectly with a multi-node Wazuh deployment — if you haven’t set that up yet, check out my previous guide on deploying Wazuh across dedicated Indexer, Manager, and Dashboard nodes.